Compiled by Gary Munkhoff
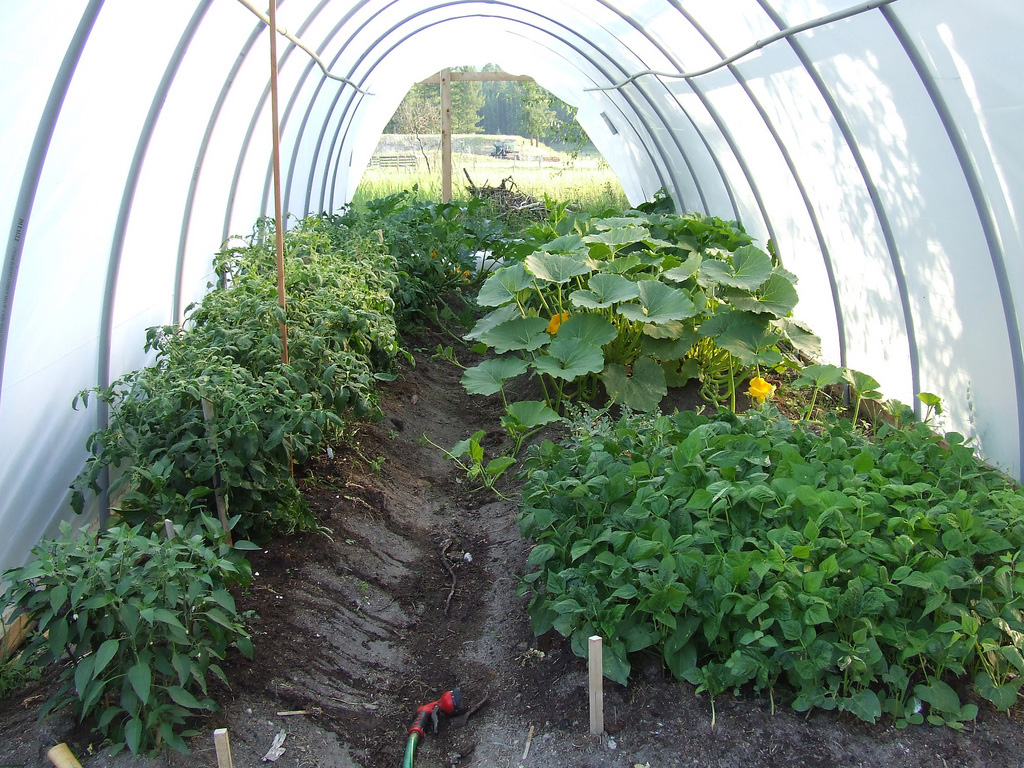
Hoop houses are a great do-it-yourself project that can make it possible for you to garden all year long. They can also be used for storage, as a temporary garage, or even as a workshop. They are inexpensive, easy to construct and when completed they also:
- Add to two months to either end of your growing season.
- Provide room to set out your plant starts until they can be planted in your garden.
- Let you grow winter greens, like spinach, all through the winter season.
- Give tomatoes those over 60 degree warm nights that they need for setting fruit.
- Protect your plants from wind and frost.
- Prevent heavy rain from damaging your plants, compacting the soil and washing seeds away.
- Minimize insect infestations.
- Can be used as a place to set up your lounge chair and sip ice tea in January and enjoy the 85 degree inside temperature.
- Can be covered with a tarp for firewood storage.
- Can be covered with shade cloth be used as a pen for poultry or game birds.
Your hoop house should be situated on a well-drained level spot that receives as much sunlight as possible. It should be located near a water source. Unlike a greenhouse, a hoop house is not usually heated in the winter. If you plan to heat yours you will need access to electricity
Hoop houses can be assembled quickly with minimal skills and tools. How long it takes to set one up depends on how large yours will be. They can be built just large enough to cover one raised bed ala a cold frame or you can build one large enough to stand up and walk around in. Because it is a portable structure, you probably won’t need a building permit, but check with your local authorities to be sure, especially if your are building a large one.
Most hoop houses are made using PVC pipe for the hoop structure, but galvanized electrical conduit can also be used. The hoops are secured to the ground either by slipping them over rebar that has been hammered into the soil or by fastening them to a lumber framework. After the hoops are in place the structure is covered with clear 6-mil polyethylene plastic sheeting. The sheeting can be fastened to the frame in several ways, such as short lengths of PVC pipe that have been slit, clips, screws, bolts, or staples.
Tools required will vary depending on the materials you use to build your hoop house, but typically include a hacksaw or pipe cutting tool, a utility knife, a drill or staple gun and a tape measure. Complete instructions and materials lists for building one are available on several websites including:
http://westsidegardener.com/howto/hoophouse.html
http://www.self-sufficient-farm-living.com/hoop-house-plans.html
If you live in an area that has very warm summer temperatures you will need to open both ends of the hoop house for ventilation. The sides can be constructed in such a way that the plastic can be rolled for additional air circulation. Or, you can completely remove the plastic covering for the summer.


2 Comments
Armine
Where in Wi are you located? I’m in Rudolph, 12 miles west of Stevens Point. Last year I built three 4 x10 x2 raseid beds. They’re 2 ft high because I have severe arthitis and had a back injury. I’ve been thinking of doing this but haven’t seen anyone doing it this early yet. I have all sorts of plants started in the house. I would love to get my gardens planted. I can take some video as I do it this year.
Susan Place
Hi Armine,
We are in Oregon. Now would be a good time to start putting up the hoops here to protect plants from the rain.